Published 9 October 2026, Updated 9 October 2026
Open the lessons list
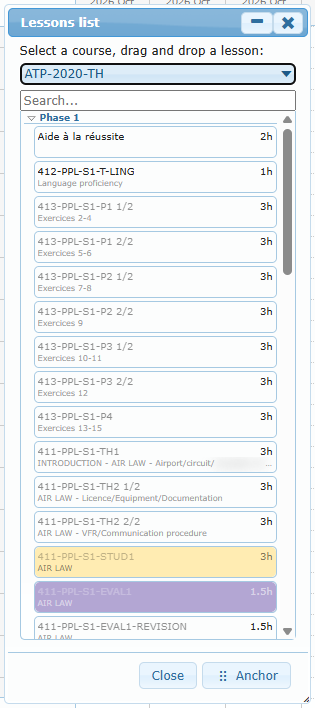
- Click Courses (blue book icon) below the calendar.
- The Lessons list panel opens. Choose the course in the selector at the top. The page remembers the last course used for the project.
- Lessons are grouped by phase. Click the small arrow beside a phase to expand it.
- Each lesson shows its title, duration (for example 3h), and description. Lessons shown faded are already done or scheduled for this group.
- Use Search… to filter lessons by title.
- Double-click a lesson to open its blank lesson sheet (PDF) in a new tab.
Anchor docks the panel beside the calendar so it stays open while you work. Click the detach icon in its header to float it again.
Drop a lesson on the calendar
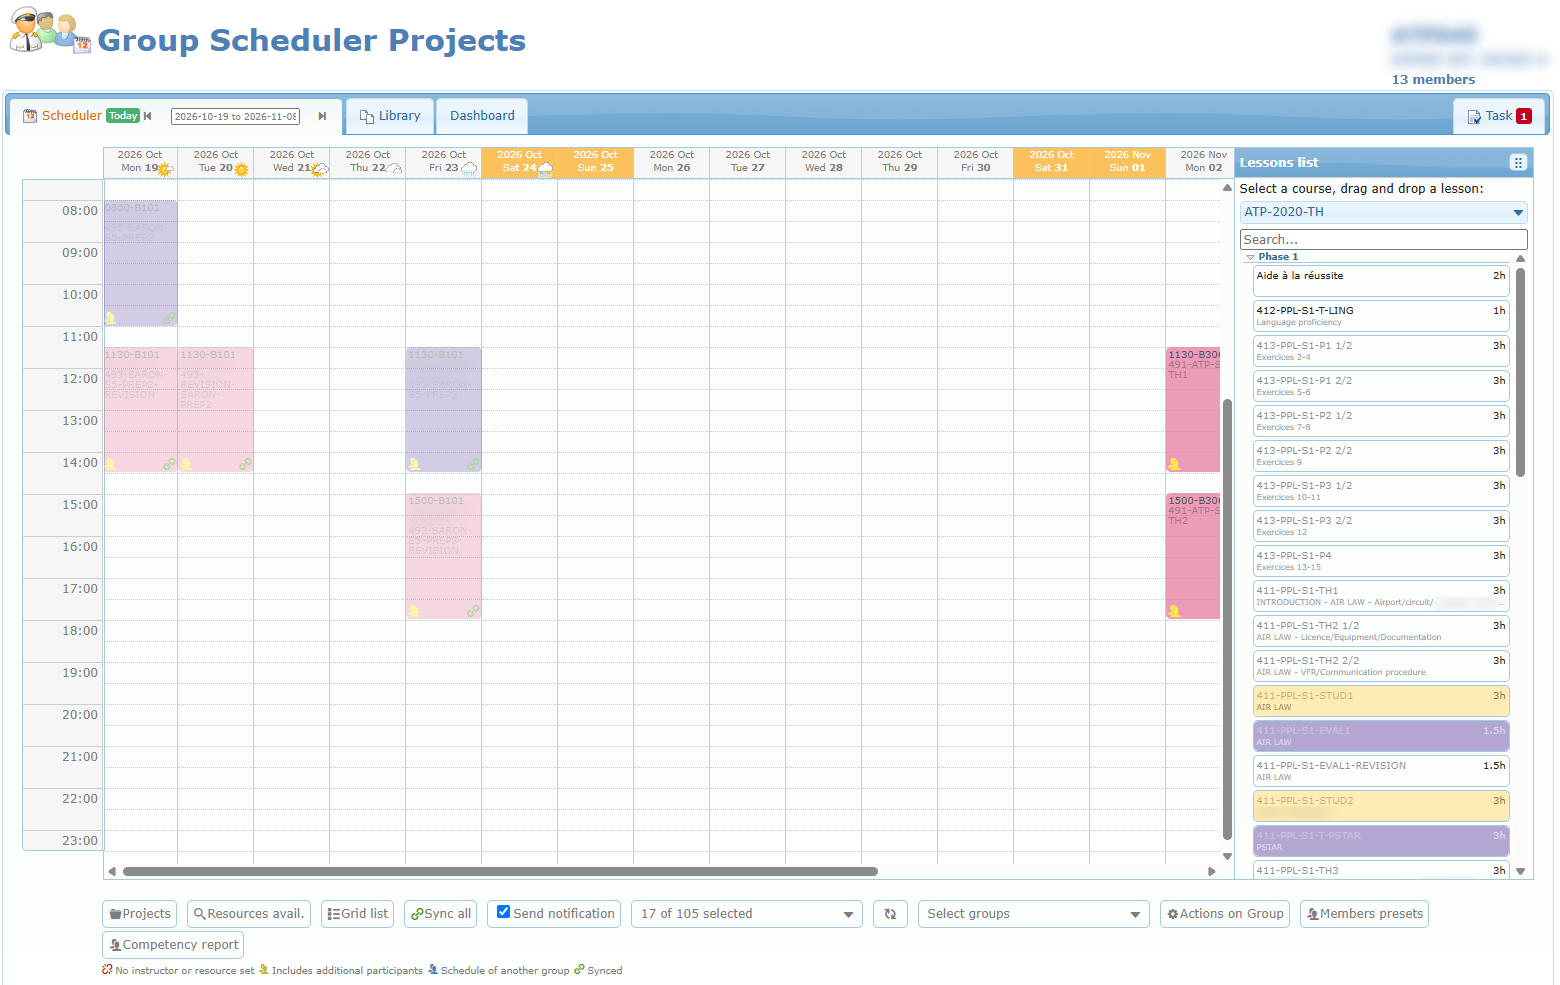
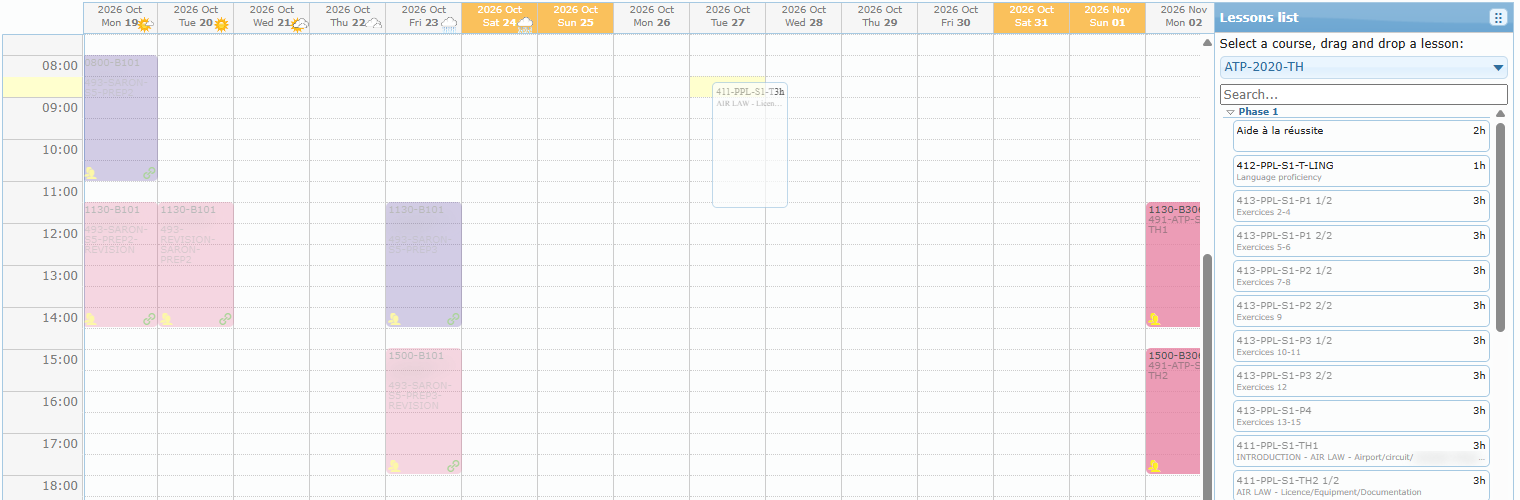
- Drag a lesson from the list.
- While you drag, the target half-hour slot and its hour are highlighted.
- Drop the lesson on the slot where it should start.
- The Add a project schedule dialog opens.
Blocking conditions:
- You cannot drop on a past date (“Impossible task in the past!”).
- You must drop exactly on a time slot (“Impossible task!”).
- If the group already has a lesson at that time, you see “The group is already schedule at the same time – Please check or modify schedules!”.
The “Add a project schedule” dialog
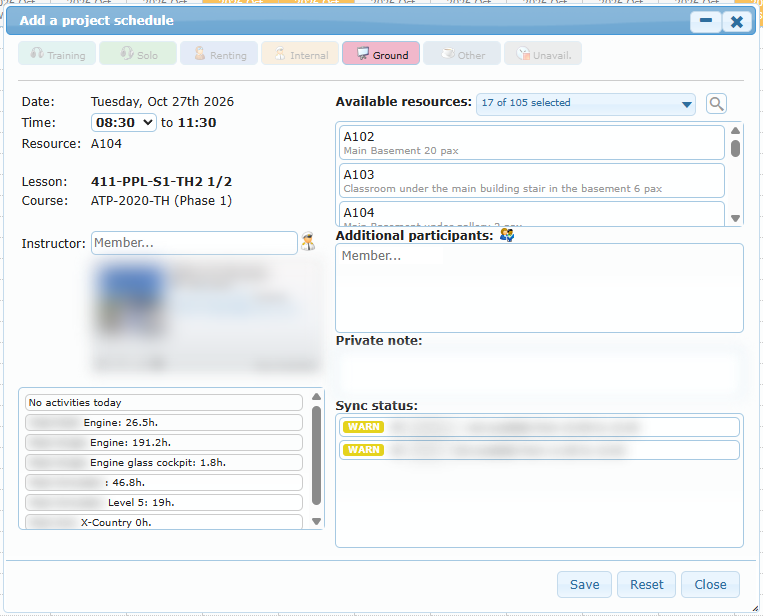
Activity type (top row). Choose Training, Solo, Renting, Internal, Ground, Other, or Unavail.. For a ground course you will normally use Ground. If the lesson defines its own activity type, that type is selected automatically and the others are locked. You must select a type before saving (“Select an activity type first!”).
Left column
| Field | Use |
|---|---|
| Date | The day where you dropped the lesson. |
| Time | Start time in half-hour steps. The end time is calculated from the lesson duration. A lesson cannot end after midnight (“Duration exceed midnight!”). Changing the time refreshes the available resources and the alerts. |
| Resource | The room you selected in the right column. A red marker appears if this room is no longer free at the selected time. |
| Lesson / Course | The lesson title and the course (phase). |
| Instructor | Type at least two letters of a name and choose from the list, or click the pilot icon to see Instructors for selected lesson. |
| Instructor card | The chosen instructor’s card and their competency status for this lesson (missing, expired, or held qualifications and roles). |
Right column
| Area | Use |
|---|---|
| Available resources | Rooms free for the whole lesson at this time. Click a room to select it. The filter defaults to ground resources or the project’s resource list. Change the filter and click the magnifier to search again. |
| Additional participants | Type a member or group name to add them. Click the presets icon to add a saved list of members. Click the small cross on a name to remove it. |
| Private note | Internal note kept with the schedule. |
| Sync status | Live check results. STOP lines block synchronization, and WARN lines are warnings only. They refresh whenever you change the time, room, instructor, or participants. |
Buttons
| Button | Action |
|---|---|
| Save | Saves the lesson in the project only and draws it on the calendar. Nothing is booked yet. |
| Reset | Clears the instructor, resource, participants, private note, and activity type. |
| History | Shows the change history (when modifying an existing lesson). |
| Close | Closes without saving. |
Tip: you can save a lesson without a room or instructor to reserve its place in the plan. It shows the red “No instructor or resource set” icon until you complete it.
Choosing an instructor from the list
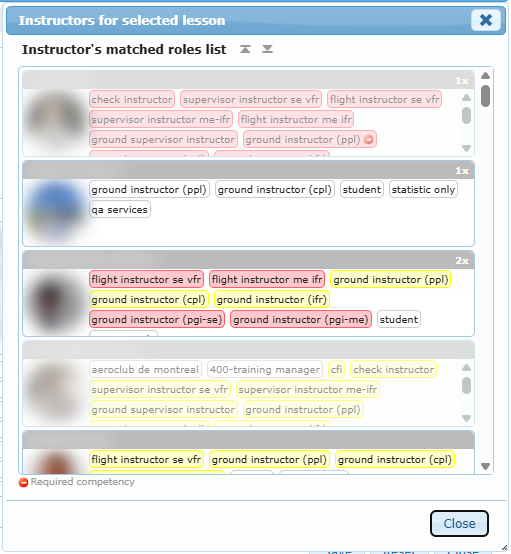
Click the pilot icon next to the Instructor field. The Instructors for selected lesson window lists the instructors whose roles match the lesson:
- Each card shows the name, photo, and matching roles.
- A badge such as 3x shows how many times the instructor has already taught this lesson.
- Greyed-out cards are instructors who are not available at that time.
- A forbidden icon marks a required competency.
- The arrows at the top collapse or expand all cards.
- Click a card to select that instructor.