
Published 9 February 2023, Updated 12 October 2026

While hovering the file thumbnail, depending on the user’s credentials, set by administrators, options are as follow:
 Delete the file. The system will automatically backup the file in a “Recycle bin” accessible by administrators only.
- Select the file
- Display
 lock or
 unlock status of the file. Accessing the file can be restricted to minimum level of power. This characteristics will prevent viewing or download of sensitives data.
- For any media type files, such as pictures, photos, screenshots, clicking on the icon
 will display a light box pictures slideshow.
Right clicking on a file will display a contextual menu as follow:


| Title | Function | Cred- dentials | Portal opts |
|---|---|---|---|
 Files |
|||
| Download | Download or open the file depending on the browser settings | ||
| Delete | Delete the file | X | |
| Cut | Cut the file | X | |
| Copy | Copy the file | X | |
| Rename | Rename the file | X | |
| Paste | Paste the copied or cut file | X | |
| Download Zip |  Download all the selected files as a compressed ZIP file | ||
| Send file | Send the file using internal messaging | ||
| More options | Opens a dialog box with more options | ||
 More options dialog box |
|||
| Download |  Download or open the file depending on the browser settings | ||
| Copy to |  Send a copy of the file to the selected member’s profile. File can be renamed | ||
| Copy |  Send a copy of the file in “My library”. Can be found later using “Connection>Documents” | ||
| Send |  Send the file using internal messaging | ||
| Lock | Lock the file choosing the minimum level of power a user must have to access the file | X | |
| Unlock | Unlock the file | X | |
Adding a file
If you have the proper credentials to add files, the portal gives you several ways to upload them: the Upload a file option of the right-click menu, the Choose file or Add a file buttons, and drag and drop. The first two open the same Choose a file source window.
The “Choose a file source” window
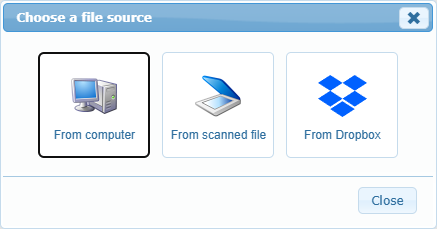
Click the place the file comes from. The window closes and the next step starts. Click Close to cancel without uploading anything.
| Choice | What happens | When it is shown |
|---|---|---|
| From computer | Opens the usual file selection window of your computer (on a phone or tablet: files, photos or camera). | Always. |
| From scanned file | Opens the scanned files center so you can pick a document scanned with an external device. | Only when the scanned files option is activated for your organization, and not in picture libraries or picture fields. |
| Cloud services: From Dropbox, From Google Drive, From OneDrive / SharePoint | Opens the cloud service in a pop-up window. Sign in if asked, then pick one file. The file is copied into AirSupervision. | Optional. Each service is shown only if it has been set up for your organization, so your window may show some, all or none of them. |
Good to know about cloud files:
- Allow pop-up windows for AirSupervision in your browser, otherwise the cloud window cannot open.
- Pick one file at a time. Folders cannot be imported.
- The size limit and the allowed file types of the place you upload to still apply. A file that is too large or of the wrong type is refused with a message.
- A Google Drive file whose owner does not allow downloads cannot be imported.
- If you close the cloud window without picking a file, nothing happens.
Upload a file from the right-click menu
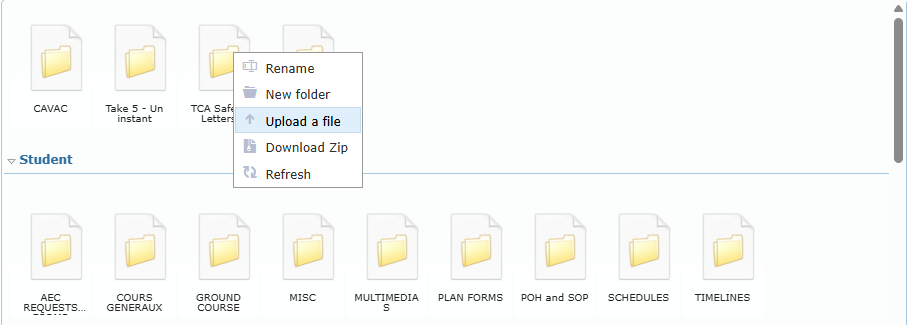
- Right-click the folder that must receive the file. To upload at the top level, right-click an empty space of the box instead.
- Choose Upload a file.
- In Choose a file source, pick where the file comes from (see above) and select the file.
- The Upload file window asks Do you need to rename the file? Pick or type a name in Change for and click Yes, click No to keep the original name, or click Cancel to stop.
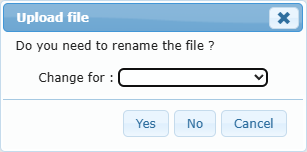
Upload a file is shown only to users allowed to manage files, and not on folders that cannot be changed.
The Choose file button

Click the folder that must receive the file, then click Choose file (Browse on some pages). The Choose a file source window opens: pick the source and the file. The name of the chosen file appears next to the button. You can then pick or type a new name, choose who can see the file when the page offers it, and click Upload.
Adding a file to a member profile
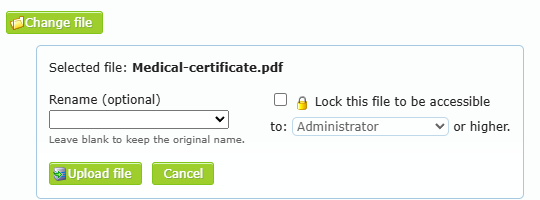
In the Files tab of a member profile, the Add section works in two steps.
- Click the folder that must receive the file (or nothing, to upload at the top level), then click Choose file and pick the source and the file.
- A panel opens with the Selected file name. The button becomes Change file if you want to pick another one.
- Optional: pick or type a new name in Rename (optional). Leave it blank to keep the original name.
- Optional: tick Lock this file to be accessible to and choose the minimum level (… or higher) that can open the file. This option is shown only to users allowed to lock files.
- Click Upload file. Click Cancel to clear the selection.
| Message | Meaning |
|---|---|
| Uploading… | The file is being sent. Wait before leaving the page. |
| File uploaded. Choose another file to upload. | Done. The file appears in the list. |
| Choose a permission level above 0 to lock this file. | You ticked the lock option without a valid level. Choose a level. |
| The file was uploaded, but its lock could not be confirmed. | The file is there but may not be locked. Check it with More options on the file. |
| Upload reported an error / Unable to confirm the upload | Read the error message, check the file list, then try again if the file is missing. |
From the scanned file center
The “Scanned files option” list all files that have been scanned using an external device and directly uploaded in on the server. From there, user can transfer these files to the member’s profile. But this component requires a Portal option to be activated by AirSupervision’s IT specifically for the organization.
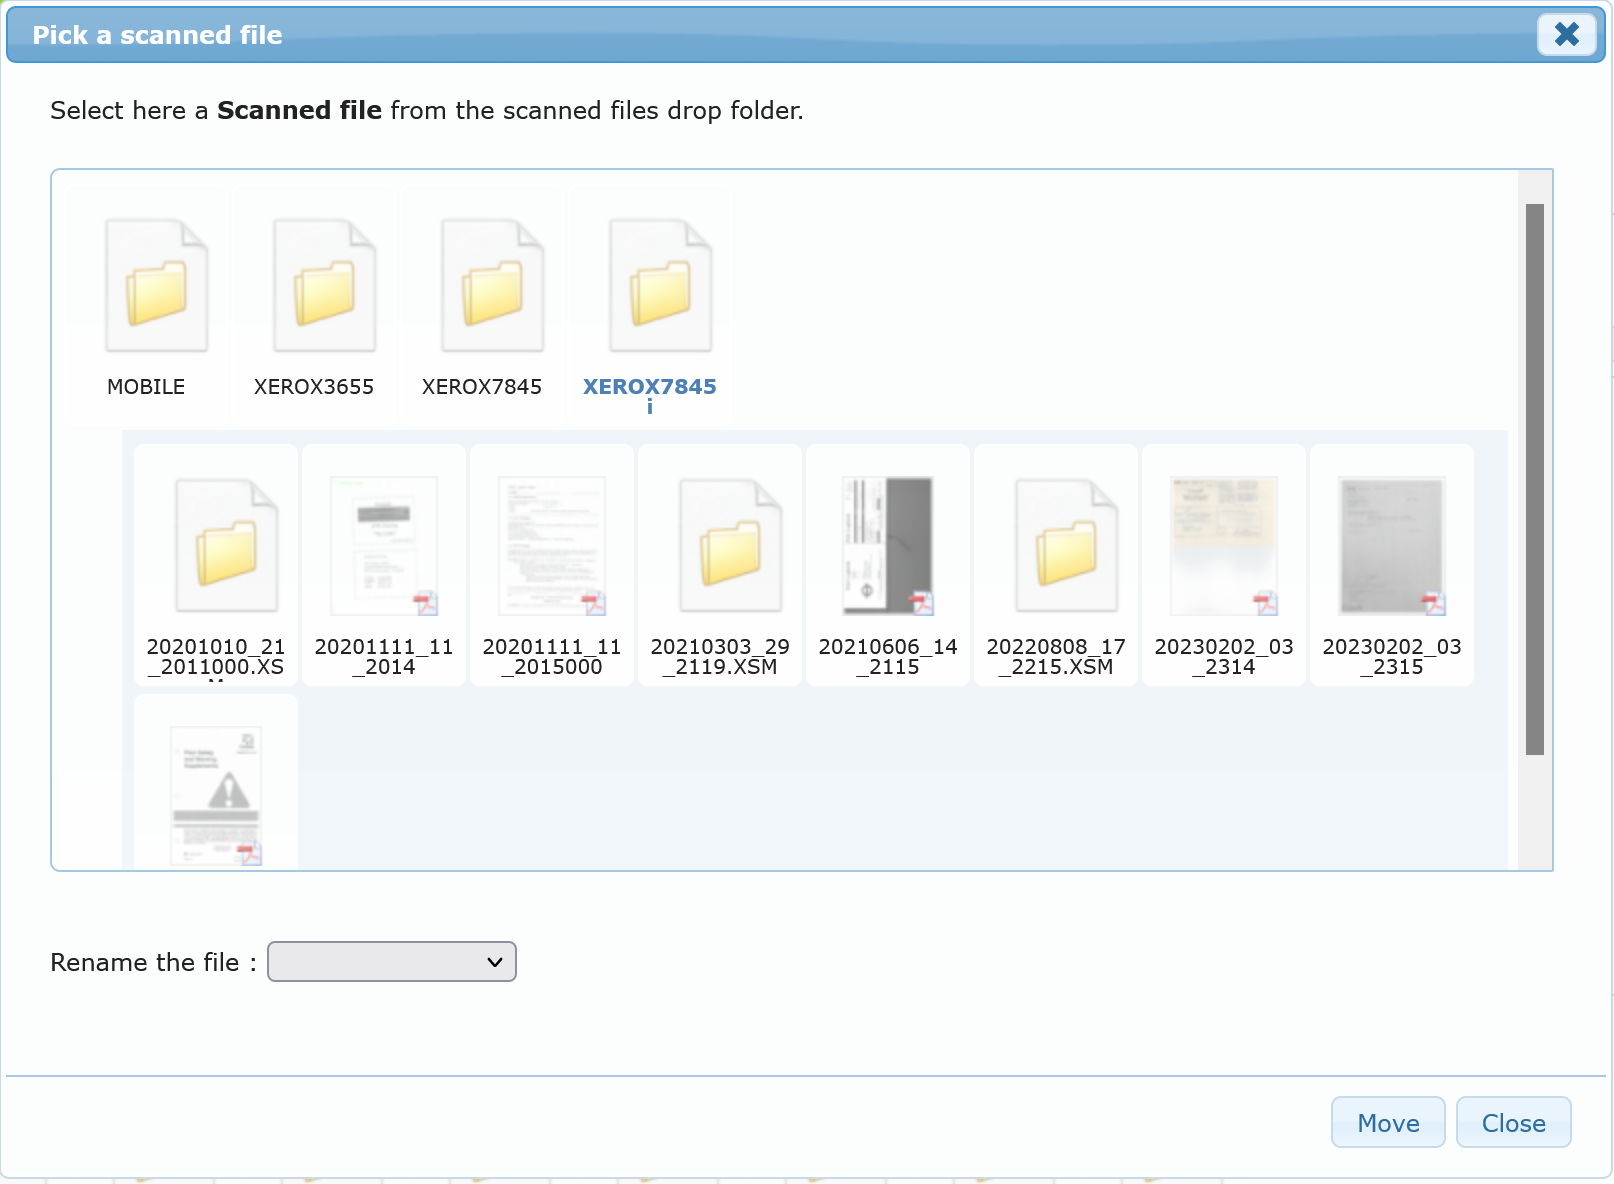
Select a place to upload the file, then choose From scanned file in the Choose a file source window and pick the document in the scanned files center. If the portal option has been set, you can also rename the file.
Drag and drop from a local computer
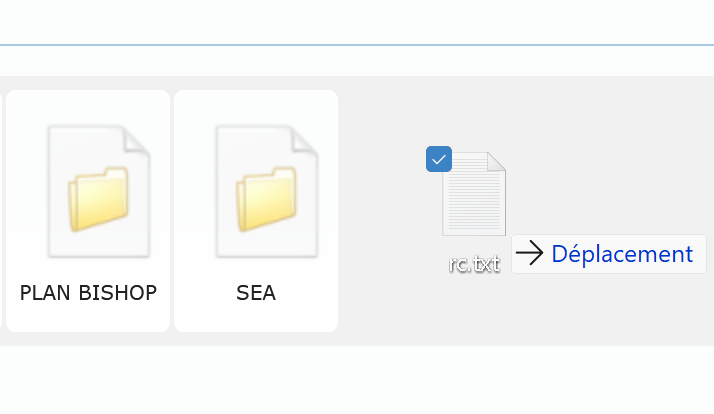
The user can drag and drop a file selected from his computer.
Drag and drop within the displayed box
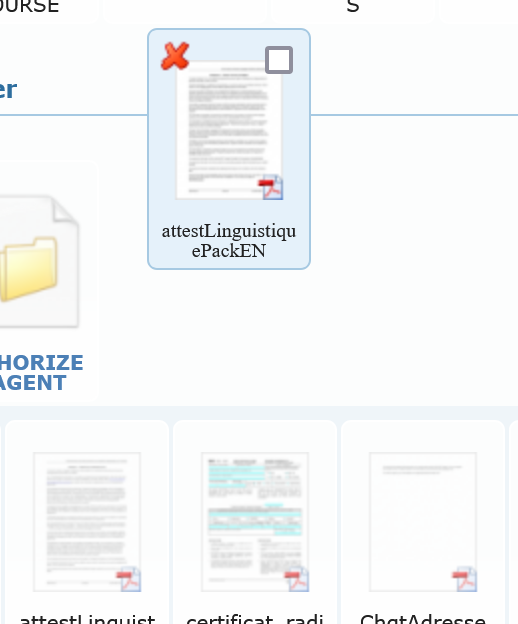
The user can drag and drop files from the system to another place.
Attaching files
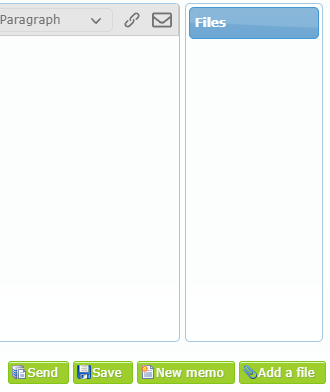
At different places, such as the “Messaging center”, “The memorandum center”, event reports and more, you can attach a file with the Add a file button or the paper clip. It opens the Choose a file source window: your computer, the scanned files center or a cloud service, when available. Drag and drop is also available.
Using mobile device
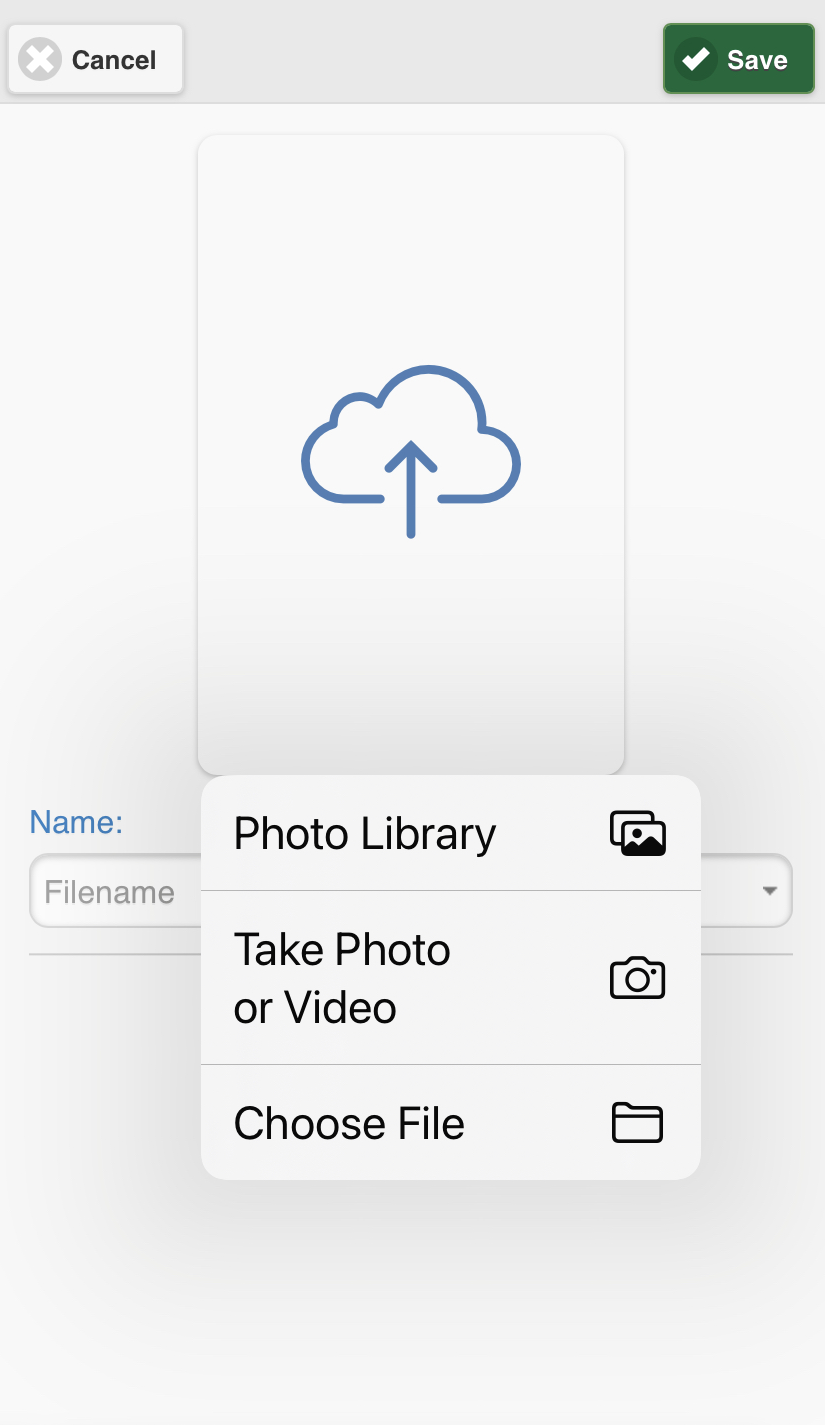
In the mobile device version, depending of the device brand, multiple option are available, including taking a picture.
The filename
Renaming the file using the dropdown combo box to whether select a predefined name or start typing a new name. Space character is not allowed in file name. AirSupervision will automatically sanitize the filename, such as removing any special character, punctuation or accent by replacing or escaping them.
While copying or dropping a file, in a folder or at the root that contains another file with the exact filename name and file extension, the system automatically add at the end of the new filename the actual date and time as follow:
filename + YmdHis + “.” + fileextention
Y : A full numeric representation of a year, at least 4 digits
m : Numeric representation of a month, with leading zeros
d : Day of the month, 2 digits with leading zeros
H : 24-hour format of an hour with leading zeros
i : Minutes with leading zeros
s : Seconds with leading zeros
So for example file220208134523.pdf for file.pdf if it already exists.