
Published 9 October 2026, Updated 9 October 2026
Why signatures matter
When the course requires signatures, each recorded lesson must be signed by the PIC (or instructor) and, for dual lessons, by the Student.
- A lesson waiting for a signature shows a check with a red pen in the lesson list and a contract icon in the Sig column of the Planning tab.
- When lessons are still unsigned, the page opens a Missing signature window: “Some lessons required signatures before being able to save any other activity!” Check which lessons need to be signed and contact the student or the instructor.
- A new lesson cannot be saved while previous lessons are waiting for signatures.
Signing a lesson that is already saved
- Open the lesson (use the To Sign filter of the … menu).
- In the Signature section, click the empty box with your role (PIC or Student).
- Sign in the window and close it.
- Click Add Sign. (or Modify or add Sign.) in the Actions panel.
The confirmation reads “Signatures has been set.” If the lesson was already signed by someone, only the new signature is saved and the lesson data stays as it was.
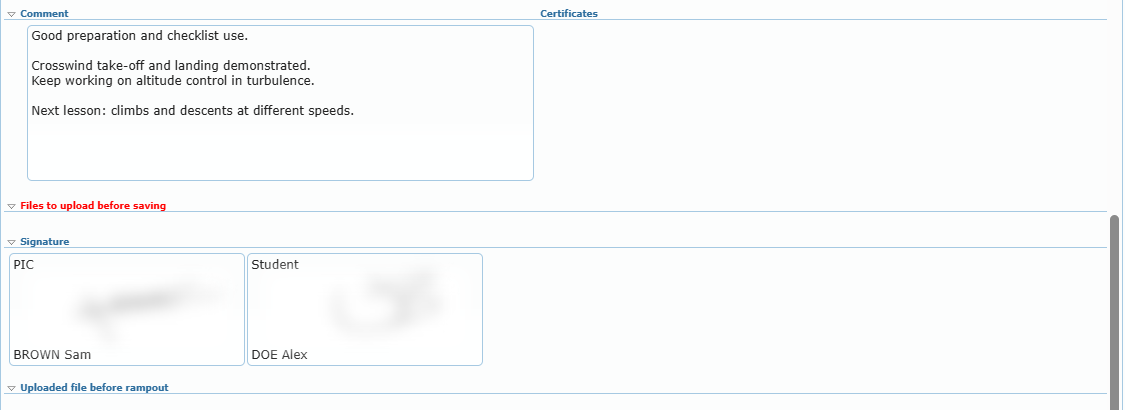
As a student: you can sign only when you are logged in with your own account. Other users see “To be log to sign” in your box. Sign right after the debriefing, otherwise your next lesson cannot be saved.
As an instructor: sign immediately after saving, and make sure the student signs on their own device or session.
When a lesson becomes locked
A done lesson becomes read-only when:
- at least one signature has been saved on it,
- it is a credited lesson,
- it was done as a co-pilot,
- the course is closed, or
- you are not the PIC of that entry.
To change a locked lesson, ask for a correction.
Requesting a correction
- Open the lesson.
- Click Request correction in the Actions panel.
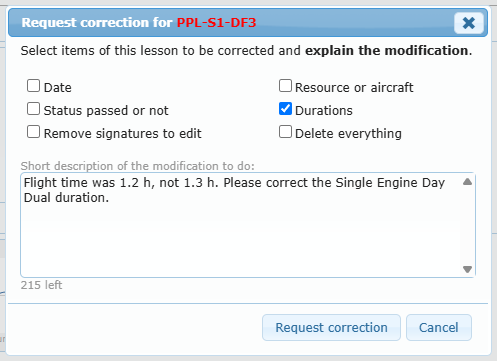
- In the Request correction for “lesson” window, tick what must change:
- Date
- Resource or aircraft
- Status passed or not
- Durations
- Remove signatures to edit
- Delete everything
- Explain the change in the text box (maximum 300 characters; the counter shows what is left).
- Click Request correction. The message “Request has been sent!” confirms it.
The request goes to the members in charge of corrections for this course (see Lesson Correction Requests). While the request is open, they can modify the lesson, remove its signatures or delete it.
Correction tools (correction managers and administrators)
| Button | What it does |
|---|---|
| Modify or add Sign. | Saves the changes made to the lesson and any new signature. |
| Remove all Signature | After confirmation (“As a course responsible you are about to remove signatures…”), removes every signature so the lesson can be edited. Warn the signers so they sign again. |
| Delete Entry! | After confirmation, deletes the lesson entry and its signatures. Tick Advise … to send a message to the PIC and/or the student. Activity sheet items not yet accepted for that entry are deleted too. A deleted lesson stays visible in the lesson History with Print deleted lesson. |
| Small server icon next to a field | Direct change of a single value (passed status, aircraft, durations, score, recommending instructor) without reopening the whole lesson. |