
Published 9 October 2026, Updated 9 October 2026
This article explains how a lesson is recorded in a training record: by the instructor / PIC after a dual lesson, or by the student when the school allows students to record some activities themselves (typically a solo flight, where the student is the PIC).
Before you start: the course must be open, the previous lessons that require signatures must be signed, and the prerequisite lessons must be passed. Otherwise the system refuses the save (see the messages table below).
Step 1 — Open the lesson
- Go to the Lessons tab.
- Click the lesson to record (use the To do filter to find it quickly).
- To record a repetition of a lesson already done, click the document with a green + icon next to it. A new line appears under the lesson.
- The lesson opens on the right with Status: None and a Save lesson button in the Actions panel.
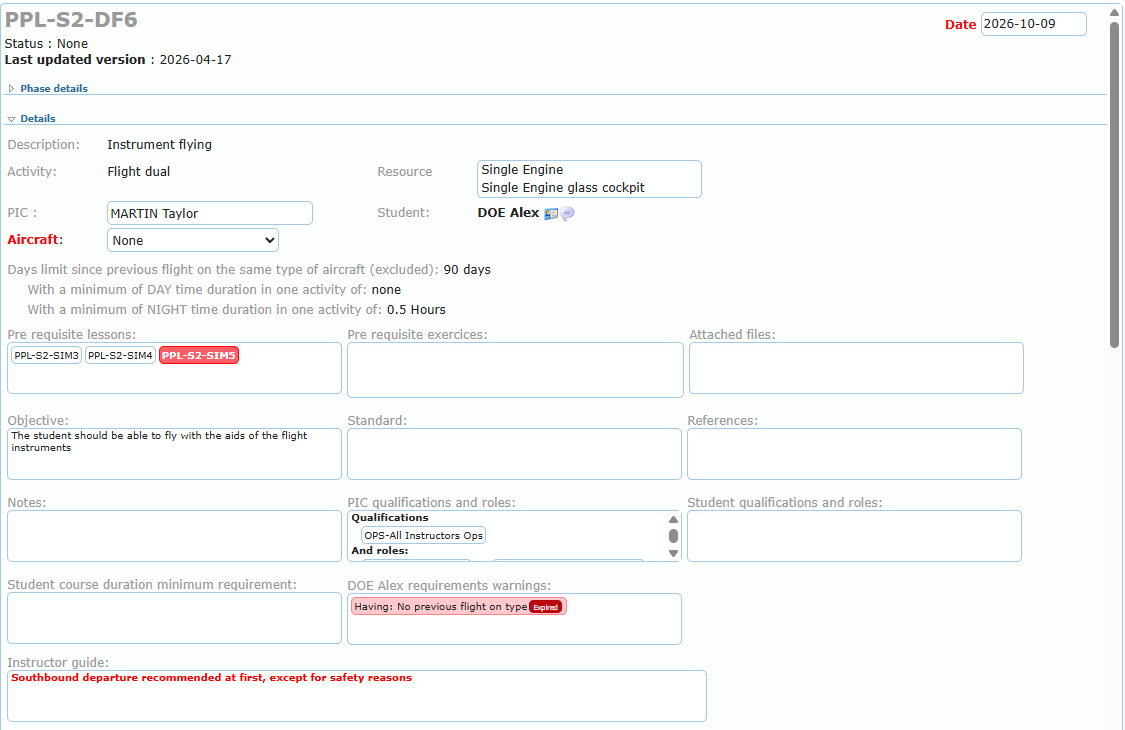
If the lesson content has been changed since you last did this lesson, a message warns: “It seems the lesson content has been updated since the last time you have completed it… Please review the lesson!”
Step 2 — Date, PIC and aircraft
| Field | What to do |
|---|---|
| Date (top right) | The date of the lesson. Today’s date is proposed. |
| PIC | For dual lessons, the PIC is normally you, the instructor, and is filled in automatically. Members allowed to record on behalf of another instructor type the actual PIC’s name and pick it from the search results. |
| Aircraft / Ressource | Choose the aircraft or simulator. The list only shows aircraft of the categories allowed by the lesson. |
| Copi (crew lessons) | Type the name of the other student and pick it from the list. |
| Recommending Instructor (when shown) | Type and select the instructor who recommends the student. |
As a student recording your own solo flight: you are the PIC. Choose the aircraft you flew and continue.
Check the requirements warnings box. A red Missing or Expired entry (for example an expired medical or No previous flight on type) usually blocks the flight or the save.
Step 3 — Grade the items
For each item, click the button of the grade obtained. The row takes the colour of the grade.
- Click the letter or number at the left end of a scale to clear the grade of that item.
- Grey buttons show the minimum grade expected.
- When the course requires it, all items must be graded before saving.
To add an exercise that is not part of the lesson, use the Additional items bar:
- Choose the group of exercises.
- Choose the item.
- Choose the type of evaluation and the grading scale.
- Click the green +. The item is added and can be graded.
Step 4 — Lesson passed or Score
Select Lesson passed: Yes or No. For scored lessons, type the Score and the maximum (for example 76 / 100). The lesson is then passed or failed automatically according to the minimum percentage of the course.
Step 5 — Durations
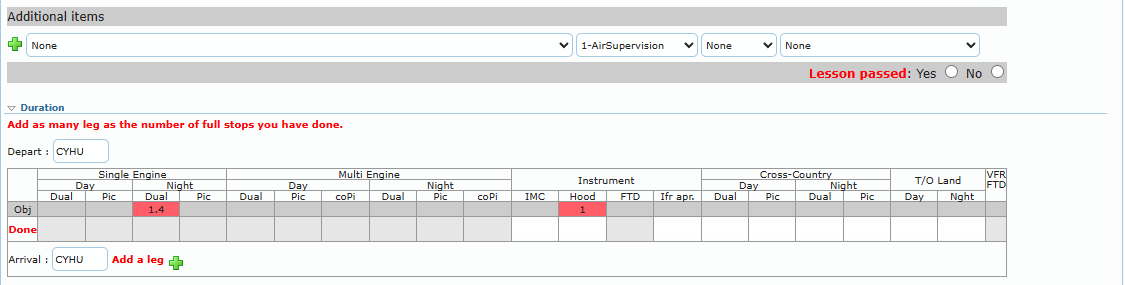
- Check the Depart airport (your base is proposed).
- Fill in the Done row. Red cells in the Obj row are columns you must fill in. Enter 0 if no time was done in that column.
- Fill in the Arrival airport.
- For a flight with several full-stop landings at different airports, click Add a leg (green +) once per additional leg. Use the red x to remove a leg.
“Add as many leg as the number of full stops you have done.” Each leg has its own durations and airports.
Times can be typed in decimal hours (1.4) or hours:minutes, depending on your school’s setting.
When the durations come from the Flight Records
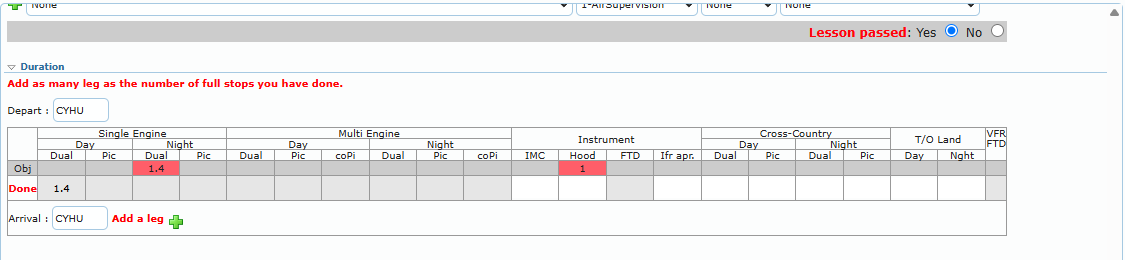
When the lesson is linked to the Flight Records, the main flight time cells are grey. You cannot type in them; they are filled from the flight recorded at ramp-in.
- Make sure the Date, the PIC and, if possible, the Aircraft are correct.
- Click a grey cell of the leg.
- The Flight Record: date window lists every activity the PIC completed (ramped in) that day that is not yet used by another lesson. For dual lessons, only the flights with this student are listed. Each line shows the type of activity, ramp-in time and total time, departure and arrival airports, aircraft, student and the lessons planned on the flight.
- Click the right flight and press Select an activity.
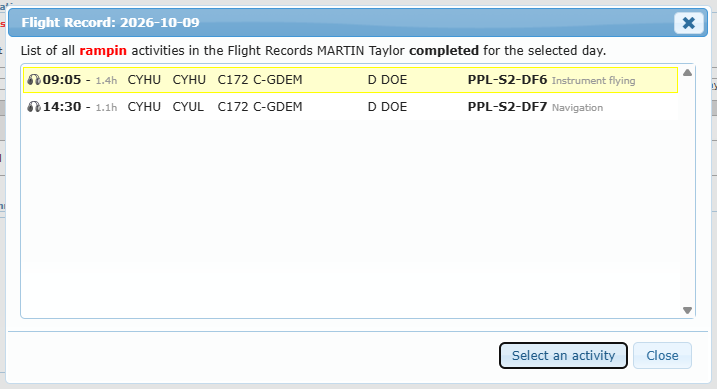
The durations, airports and aircraft are filled in automatically from the flight.
Good to know:
- Each leg needs its own flight record, and the same flight cannot be used twice.
- If you change the Date or the Aircraft after selecting a flight, the message “Changing the date or the resource will remove all duration set!” appears. Reset and Continue clears the durations; Cancel keeps the previous value.
- If you change the PIC, the selected flights and durations are cleared. Select them again.
- If no flight is listed, the flight is not ramped in yet, was recorded with another PIC, student, date or aircraft category, or is already linked to another lesson. Ask dispatch to check the Flight Records.
Step 6 — Comment, files and signatures
- Type the Comment: what was done, strengths, points to improve, next lesson.
- If Files to upload before saving is shown, click each tile and choose the file to upload. The tile shows the file once uploaded.
- If the course uses signatures, click the PIC box (and the Student box if the student is with you and logged in) to sign.

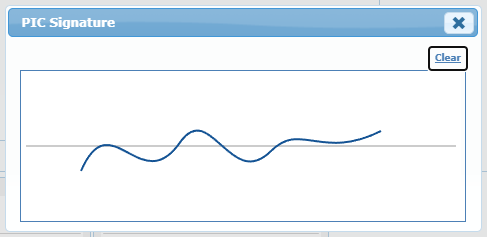
The signature window opens. Sign with the mouse, finger or stylus and close the window. Clear erases the drawing.
Step 7 — Save
Click Save lesson in the Actions panel.

Depending on the lesson, one of these windows appears first:
| Window | What it means | Your choices |
|---|---|---|
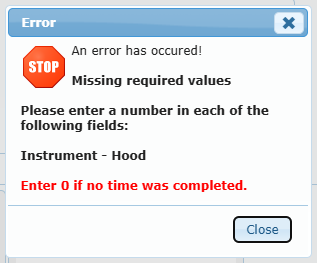
| Error — Missing required values | A required duration column is empty. The window lists the fields. | Close, then enter a number (0 if no time). |
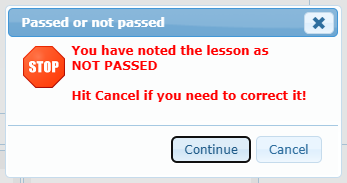
| Passed or not passed | You set the lesson as NOT PASSED. | Continue to save as not passed, or Cancel to correct. |
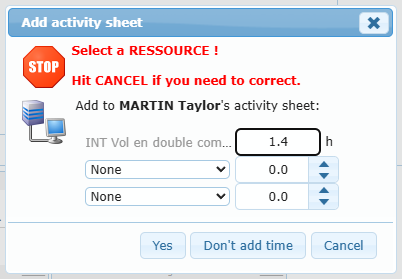
| Add activity sheet | Your school links lessons to the instructors’ activity sheets. The window proposes to add the lesson time to the PIC’s activity sheet, with two optional extra lines (for example briefing time). It also lists last-minute warnings such as Select a RESSOURCE !, The DATE is not valid !, Select a RECOMMENDING instructor !, All ITEMS have to be graded ?, SCORE is mandatory !. | Yes (save and add the time), Don’t add time (save only the lesson) or Cancel to correct. |
After saving, a Confirmation window says “The lesson … has been saved.” and may add, for example, “Activity has been added to …’s activity sheet”, “One or more Signatures have been set” or “The lesson has been automatically assessed as PASSED…”.
If something is wrong, an Error window lists the reasons and states “Nothing has been saved!”. Click Close and correct. Your entries are kept so you can fix them.
Do not refresh the page after saving. The system detects double entries (“It seems it is a double entry. Do not refresh the actual page.”).
Messages that block a save
| Message (summary) | What to do |
|---|---|
| A pre-requisite lesson has not been passed before the actual lesson… | Pass the prerequisite lesson first (red box in Details). |
| A mandatory lesson has not been passed before this lesson. | Pass the mandatory lesson (bold, rubber stamp) that comes before. |
| One or more pre-requisite exercises have not reached the required grade. | Check Pre requisite exercices. Those exercises must reach the grade in an earlier lesson. |
| Signatures are missing to … previous lesson(s). It has to be signed before saving the actual one. | Use the To Sign filter and sign the previous lessons. |
| PIC / Student requirement failed! | The PIC or the student is missing a qualification, role or memo required by the lesson. |
| Requires … h. … | The student does not yet have the minimum experience required before this lesson. |
| You have passed the number of allowed repeated lessons. | The lesson cannot be repeated again. Contact the course responsible. |
| This lesson can not be repeated because the last same lesson has been passed. | The lesson is already passed. |
| Specify a resource. / The resource does not exists. | Choose the aircraft. |
| The date is not valid. | Correct the date. |
| The recommending instructor is missing. | Select the recommending instructor. |
| A copilot is required. / A different copilot is required. / The copilot duration is not valid… | Complete the co-pilot information of a crew lesson. |
| No item has been graded. / All items have to be graded. | Grade the items. |
| Score is missing or format is not correct. | Type a valid score and maximum. |
| No time has been specified. / No time specified on leg … / A time value is not valid. | Fill in the durations with valid numbers. |
| Departures and destinations does not exists or count is not the same. / The legs count are not equal. | Check that every leg has a departure and an arrival airport. |
| Sum of cross country duration and instrument times can not exceed flight duration. | Reduce cross-country or instrument time. |
| FTD duration can not be combined with flight duration. | Record simulator and aircraft time in separate lessons or legs. |
| Choose between Single or Multi engine flight. | Use only one engine category per leg. |
| Choose between DUAL or PIC-CoPi flight. | Do not mix dual and PIC/co-pilot time in one leg. |
| Cross country DAY/NIGHT can not exceed DAY/NIGHT duration flight. | Correct the cross-country time. |
| One or more required logbook values are missing. Enter 0 if no time was completed. | Fill the red columns. |
| One or more mandatory files to upload before saving are missing. | Upload the files shown in Files to upload before saving. |
| A flight record is required for this lesson. / Flight record activity is mandatory. / Select a flight record for every lesson leg. | Select the flight in the Flight Records window. |
| The same flight record cannot be used twice. | Choose a different flight for each leg. |
| The selected flight must be completed, unused, and match the actual PIC, student, date and lesson aircraft. | Select the flight again after correcting the date, PIC or aircraft. |
| The flight record aircraft category … does not match the lesson requirement… | The aircraft flown is not allowed for this lesson. |
| PIC signature missing to renew competency. | The PIC must sign when the lesson renews a competency. |
| You can not add or modify this lesson. / You cannot register this lesson for the selected course and PIC. | You do not have the right to record this lesson for this course or PIC. |
Lessons recorded elsewhere
- Some courses are recorded only through Multiple Entries (several students at once). In those courses the lesson panel is read-only. See Multiple Entries.
- Lessons done as a co-pilot of another student’s session are created automatically and cannot be modified from this record.