
Published 9 October 2026, Updated 9 October 2026
Details tab
The Details tab is the identity card of the training record.
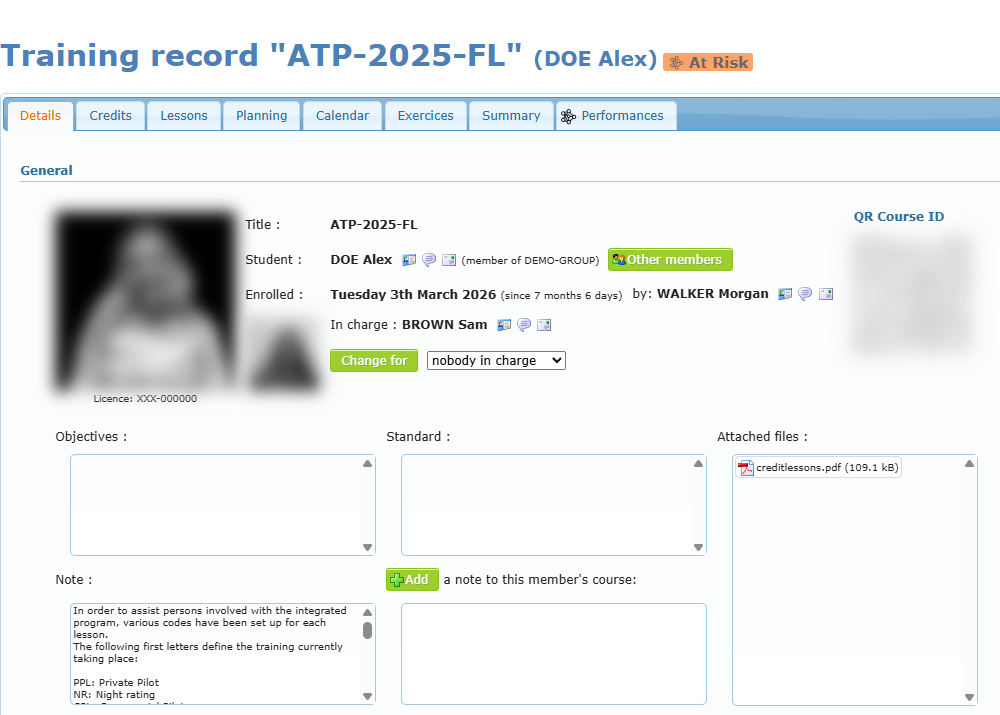
General block
| Element | What it shows |
|---|---|
| Photo and licence | The student’s picture and licence number. |
| Title | The course name. |
| Student | The student’s name followed by three icons: ID card (opens the profile in a new tab), speech bubble (sends an internal message) and envelope (opens an email). When the student belongs to a group, the group name is shown, and staff see an Other members button that lists the group. |
| Enrolled | The course start date, how long ago it was, and who enrolled the student. |
| In charge | The person responsible for the student’s training (or “Nobody in charge”), with the same three icons. |
| QR Course ID | A QR code that identifies this training record for the mobile application. |
As a student: use the icons next to In charge to contact the person responsible for your training directly.
Changing the person in charge (staff)
- Choose a member in the list next to Change for.
- Click Change for.
- The Changed of responsible dialog asks you to confirm:
- Yes and alert — changes the person in charge and sends a message to the previous and the new person in charge.
- Yes — changes the person in charge without any message.
- No — cancels.
The change is written in the course History.
Objectives, Standard, Attached files and Note
| Box | Content |
|---|---|
| Objectives / Standard | The course objectives and the standard to reach, as written in the course design. |
| Attached files | Documents attached to the course. Click a file to open or download it. A greyed file no longer exists on the server. |
| Note (left) | The general note written in the course design. |
| Note (right) | A note about this student’s course. Staff with enough rights type the text and click Add. |
Additional fields
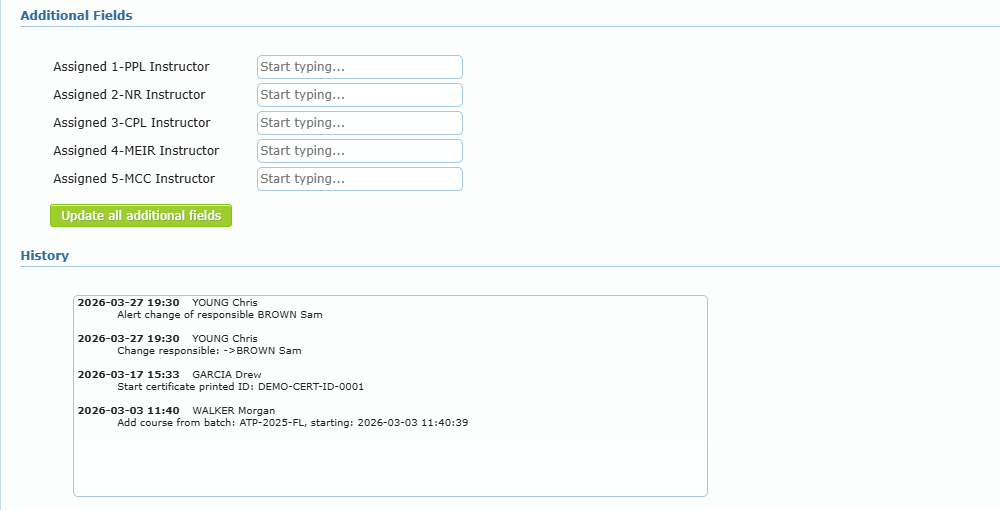
When your school has defined additional fields for the course, they appear under Additional Fields (for example the instructor assigned to each stage). Staff with enough rights fill them in and click Update all additional fields. Hover a field to see who changed it last and when. Other users see the values read-only.
Display or hide phases
Members selected in the course design can hide phases that do not apply to one student. Tick the phases to hide and click Update hidden phases. Hidden phases disappear from the Lessons, Credits, Planning and Performances tabs for this student only. The option is not available on a closed course.
History (staff)
The History box lists every change made to the record: change of person in charge, credits, notes, certificates printed, closing and reopening, start date changes.
Course action buttons

| Button | What it does | Who sees it |
|---|---|---|
| Certificates | Opens the list of certificates that can be printed for this course. | When certificates are defined for the course |
| Add to my favorites | Adds this training record to your favorites for quick access. | Everyone, until added |
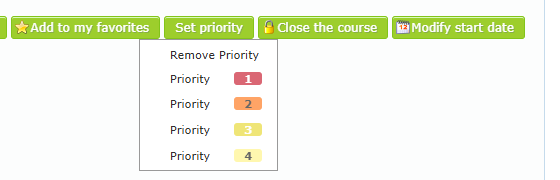
| Set priority | Opens a menu: Priority 1 (red) to Priority 4 (light yellow) or Remove Priority. The badge appears next to the page title and in the course lists. | Course managers |
| Close the course | Closes the training record (see below). | Course managers |
| Reopen the course | Shown instead of Close on a closed course. | Course managers |
| Modify start date | Changes the enrolment date. | Administrators |
Certificates menu
Each certificate in the menu has an icon:
- Green check — all requirements are met. Click to open the certificate as a PDF.
- Warning sign — the certificate cannot be printed yet. Hover it to see what is missing: Missing passed lessons (lessons not yet passed) and Missing duration experience (minimum times not yet reached).
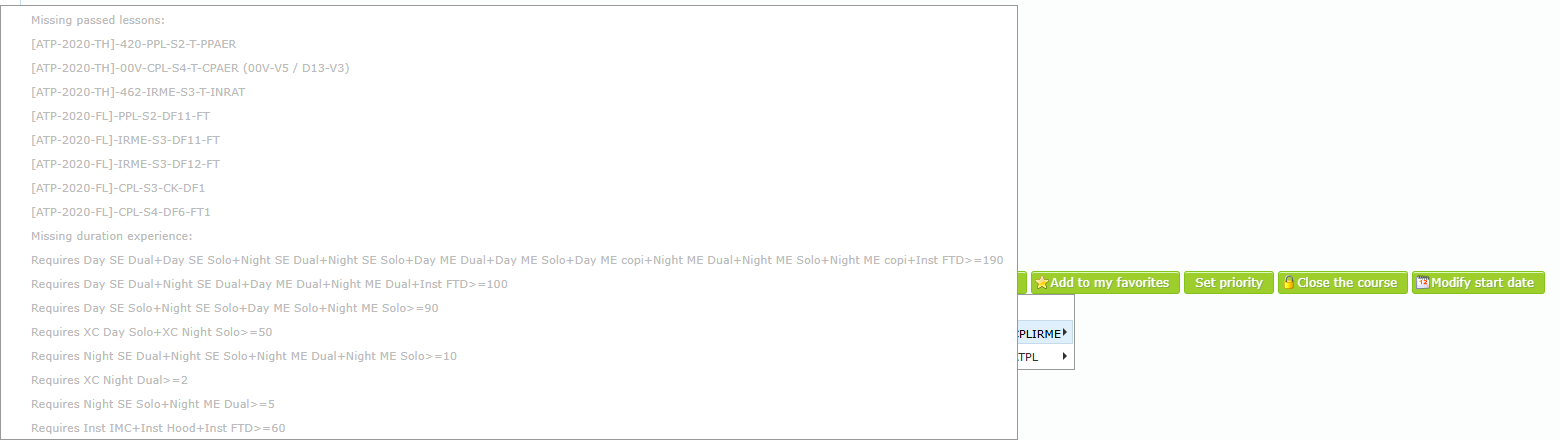
As a student: the warning sub-menu is a precise checklist of what you still need before your certificate can be issued.
Setting a priority
Closing and reopening a course
- Click Close the course.
- The Confirmation dialog asks “Are you sure you want to close this course?”. Choose a reason in the list (its description appears below the list). Choosing the real reason keeps the audit statistics reliable.
- Click Yes to close, or No to cancel.
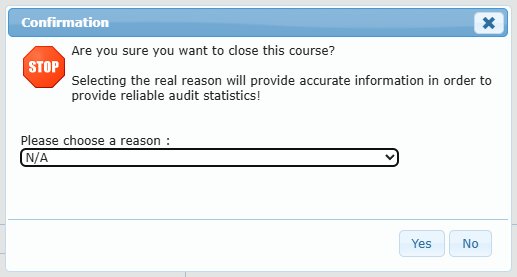
When a course is closed:
- The Details tab shows “This course has been closed”, the date, who closed it and, for staff, the close reason.
- Lessons, credits, planning and additional fields become read-only. No new lesson can be saved.
- Reopen the course puts the record back in service.
Modifying the start date (administrators)
Click Modify start date, choose the new date and click Modify the starting date. The date cannot be later than the first recorded lesson. If it is, the system uses the first lesson date.
Credits tab
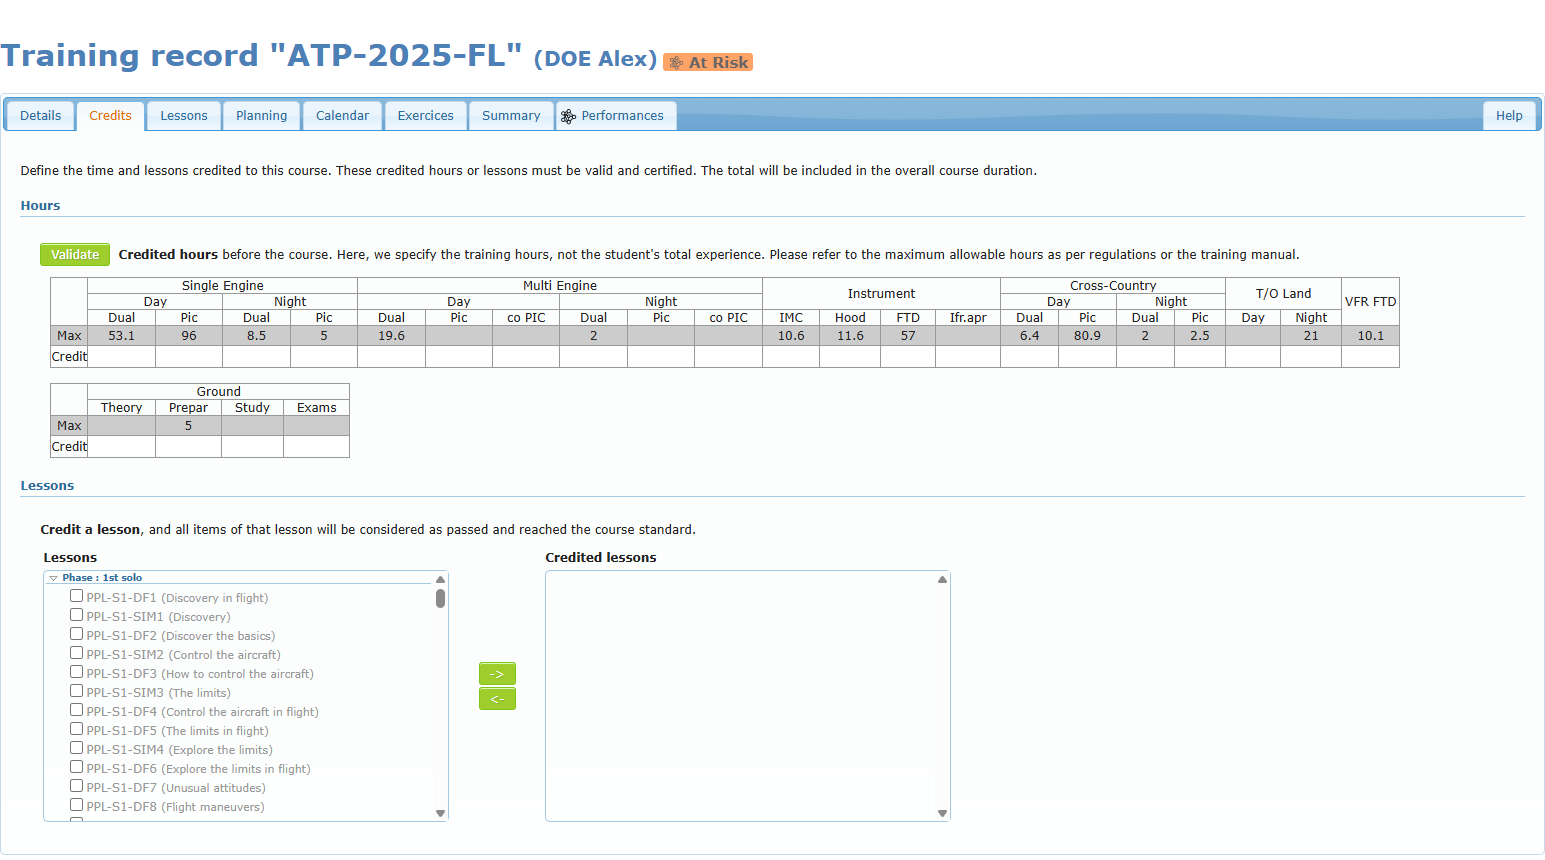
The Credits tab records training already completed before the course (for example in another school) and recognised by your organization. Credited hours and lessons count in the course totals and progress. They must be valid and certified.
Credited hours
The Hours table uses the logbook columns (Single Engine, Multi Engine, Instrument, Cross-Country, take-offs and landings, VFR FTD) plus a Ground table (Theory, Preparation, Study, Exams).
| Row | Meaning |
|---|---|
| Max (grey) | The maximum credit allowed by the course design (regulation or training manual). |
| Credit | The hours actually credited to this student. |
To credit hours: type the values in the Credit row and click Validate. Enter the training hours to credit, not the student’s total experience.
Credited lessons
Crediting a lesson means all its items are considered passed and at the course standard.
- In the Lessons list (left), tick the lessons to credit. Lessons in bold, with a rubber stamp, are mandatory.
- Click ->. The lessons move to Credited lessons (right) and show a money bag icon in the Lessons tab.
- To remove a credit, tick it in the right list and click <-.
As a student: you can read the Credits tab, but only members with the credit permission can change it. A credited lesson cannot be opened for modification.