
Published 10 October 2026, Updated 10 October 2026
Adding a course
- Click Add a course in the Filters panel (or the + button in the Advanced view).
- Fill in the Add Course window (see the option reference below).
- Click Add. Click Close to cancel.
The new course appears in the list after a few seconds. Large files take longer to upload: don’t close the page during the upload.
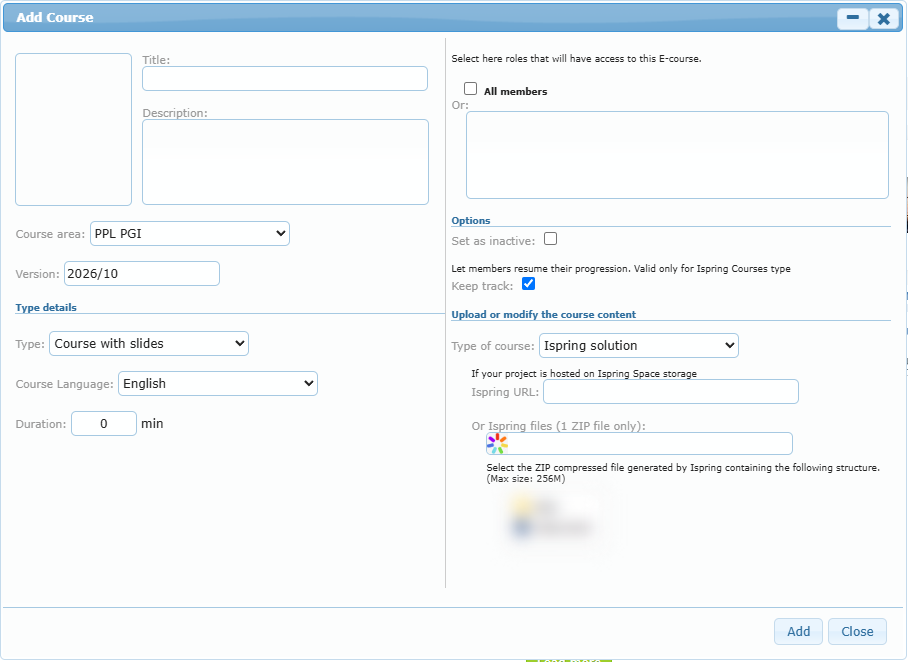
You can add a course only in a course area where you are a Responsible. If you choose another area, the course isn’t created.
Modifying a course
Click the blue pen on the course card, or right-click the card and choose Edit. The Modify a Course window opens with the current values and these buttons:
| Button | What it does |
|---|---|
| Test the project | Opens the course content in a new tab so you can check it. Use it after uploading new files. |
| Modify | Saves your changes. |
| Correction requests | Opens the list of correction requests sent for this course (see Reviewing e-courses, corrections and backups). |
| Close | Closes the window without saving. |
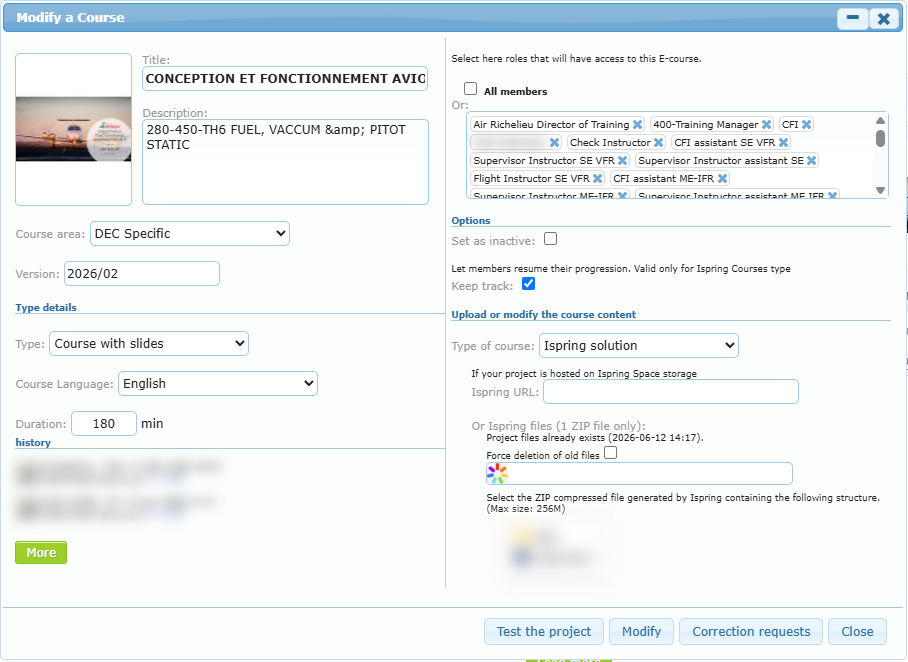
The history block (left side, bottom) shows who created, last modified and last reviewed the course. Click More to open the full history of the course.
Option reference
Left side: description of the course
| Option | Purpose and impact | Recommended use |
|---|---|---|
| Thumbnail (picture box) | Click the box to choose the cover picture shown on the cards (JPG, JPEG, PNG, BMP or GIF; best size 300 × 400 pixels). | Use a clear picture with the course name, so members recognize it in the grid and on the phone. |
| Title (mandatory) | The course name shown everywhere. | Start with a code if your courses follow a programme (for example “PGI TC09-Turns”), so sorting by title keeps the order. |
| Description | Short text under the title and in the tooltip. Members can search on it. | Put keywords members will type in the search box. |
| Course area (mandatory) | The family the course belongs to. Decides who can manage and review it. | Choose the area of the programme. |
| Version | Free text, proposed as year/month (for example “2026/10”). Shown in the tooltip. | Update it each time you upload new content so everyone knows which edition is online. |
| Type | “Course with slides”. | Keep the default. |
| Course Language (mandatory) | Language of the content. Feeds the Language filter and the language step on the mobile version. | One course per language: create separate courses for English and French versions. |
| Duration | Estimated time in minutes. Shown in hours on the cards (“3 hours”) and on the phone (“1.5 h”). 0 = no badge. | Give a realistic duration so members can plan. |
Right side: who can follow the course
| Option | Purpose and impact |
|---|---|
| All members | Every member can see and launch the course. |
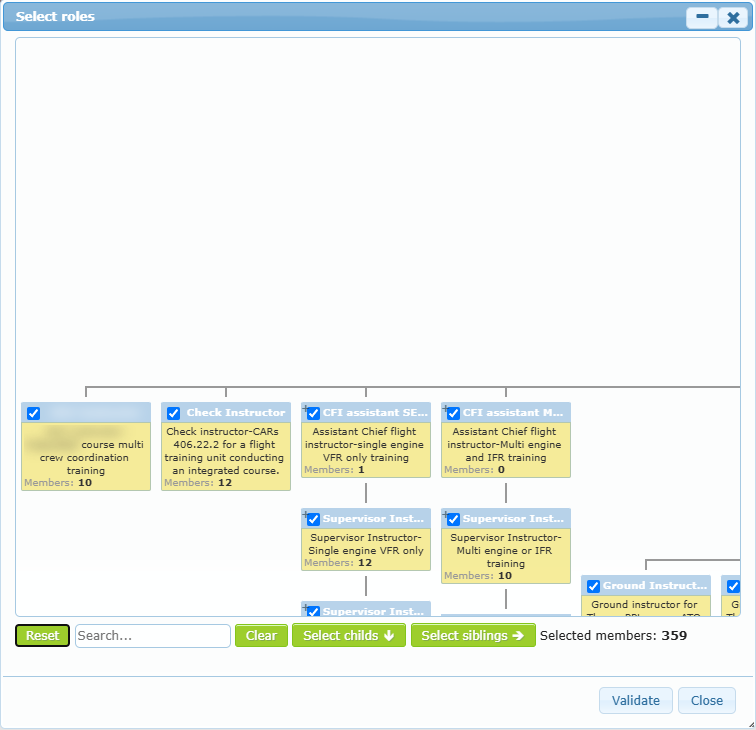
| Or: roles list | Click inside the box to open the Select roles window, then tick the roles that can follow the course. Only members holding one of these roles will see it. Remove a role with the small x on its label. |
If you select roles, the roles decide: All members only applies when the roles list is empty. If you tick neither All members nor any role, only managers and members with Can see and launch all E-courses can see the course.
In the Select roles window, the organization chart shows every role with its description and its number of members. Tick roles one by one, or select a role and use Select childs (the role and all roles under it) or Select siblings (the roles at the same level). Clear unticks everything, Search… + Enter finds a role, Reset restores the chart display. Selected members shows how many people will have access. Click Validate to keep your selection or Close to cancel.
Options
| Option | Purpose and impact |
|---|---|
| Set as inactive | Hides the course from members without deleting it. Managers still see it with Display inactives. Use it to prepare a course before publishing it or to retire an old edition. |
| Keep track | Lets members resume where they stopped and records their progress (Started / Completed). Works for iSpring courses and SCORM packages. Switched on by default. |
Upload or modify the course content
Choose the Type of course, then provide its content:
| Type of course | What to provide | Notes |
|---|---|---|
| Ispring solution | Either the Ispring URL (if the project is hosted on iSpring Space), or one ZIP file generated by iSpring with the HTML5 output at its root (as shown in the small example picture). | When files already exist, the window shows their date and a Force deletion of old files box: tick it to replace the whole content by your new ZIP instead of adding files to it. |
| Powerpoint presentation | One PowerPoint file. | It is shown with the free Office 365 online viewer. Documents are NOT protected and can be downloaded by viewers. Don’t use this type for confidential material. |
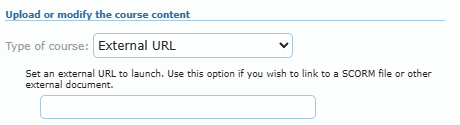
| External URL | The web address to open. | Use it for a SCORM course hosted elsewhere or any external document or platform. |
The maximum file size is shown in the window.
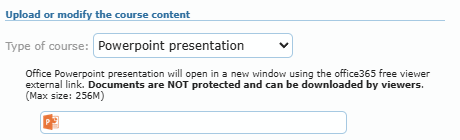
Remove a file you selected by mistake with the small x at the right of the file box.
Messages you may see
| Message | Cause and solution |
|---|---|
| Title is mandatory! | Type a title. |
| Course area is mandatory! | Choose a course area. |
| Language is mandatory! | Choose a language. |
| file is not a ZIP file! / Ispring File error! | The iSpring content must be one ZIP file. Re-export it from iSpring and compress the HTML5 output folder. |
| Powerpoint File error! / SCORM package error! / File error! | The file couldn’t be read. Check its format and size and try again. |
| Cover File error! | The thumbnail isn’t a supported picture. Use JPG, PNG, BMP or GIF. |
What happens after saving when review is enabled
If your organization uses e-course review and you don’t have the Can review E-courses credential:
- a new or modified course is marked To review;
- members can’t see it until a reviewer validates it;
- new files you upload are kept as pending content, separate from the published content;
- members with the review credential receive a message (if notifications are enabled).
If you are a reviewer of that area, your own changes are published and marked as reviewed immediately.