
Published 27 February 2026, Updated 28 February 2026
Importing from file helps you add multiple members faster, without typing each profile manually. The system checks your file before saving anything, so you can correct issues early and avoid partial data.

What is a CSV file?
A CSV file is a simple spreadsheet file where each line is one person and each column is one field (for example Lastname, Givenname, Email). You can create it in Excel, LibreOffice Calc, Google Sheets, or similar tools, then save/export as .csv.
Think of CSV as a “table in text format” that systems can read quickly.

Before you start
Make sure:
- You have permission to add members.
- Row 1 contains the column names (headers).
- Each member is on one line only.
- You review spellings and email addresses before upload.
If one row is invalid, the import is blocked and nothing is saved.
Required file schema
Use these header names in your CSV file. Header names are case-insensitive, but wording must match the list below.
| Column header | Required | Purpose |
|---|---|---|
lastname | Yes | Member family name |
givenname | Yes | Member first name |
email | Yes | Main email/login address |
address | No | Mailing or contact address |
licence | No | License number |
phone1 | No | Main phone number |
cell1 | No | Main mobile number |
phone2 | No | Secondary phone number |
cell2 | No | Secondary mobile number |
birthday | No | Date of birth |
addinfo_1, addinfo_2, addinfo_12… | No | Additional information slots (the number identifies which slot is filled) |
Important:
- Do not add extra headers that are not in this list.
- addinfo_ headers must end with a positive number (addinfo_1, addinfo_2, addinfo_12, etc.).
- If required headers are missing, import is blocked.
- Extra columns are rejected in this import tool.
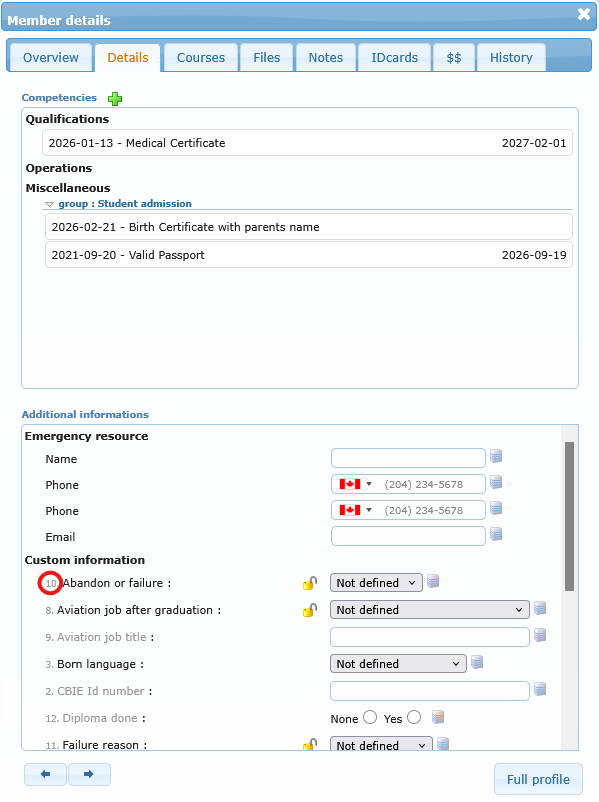
Where to find the additional infos Identifier
When displaying any member’s details in the right panel, tab ‘Details’ get the number in front of the field.
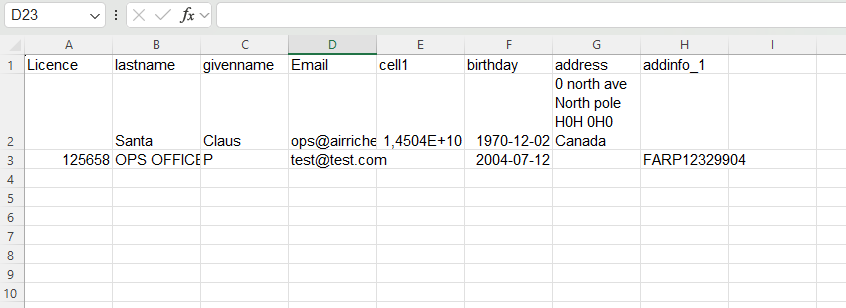
How to create the file in Excel (or similar)
Open a blank worksheet and place the allowed headers in row 1. Then enter one member per row. Keep values clean and consistent, especially names, emails, license numbers, and any addinfo_ values.
When ready:
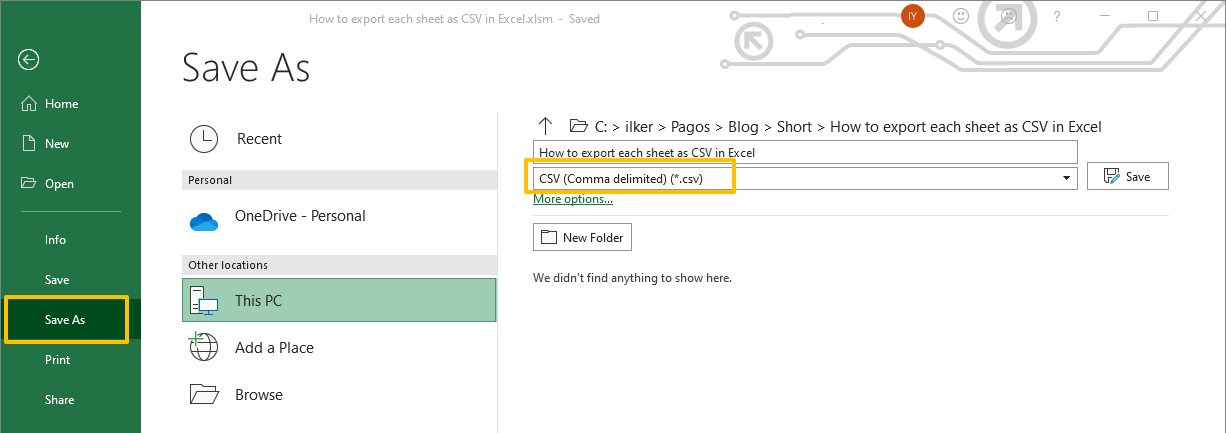
- Use File > Save As.
- Choose CSV format (CSV UTF-8 is recommended when available).
- Save and close the file.
If your spreadsheet software asks about keeping only the active sheet or CSV limitations, confirm and continue. That is normal for CSV exports.
Import steps in AirSupervision
From the Members List page:
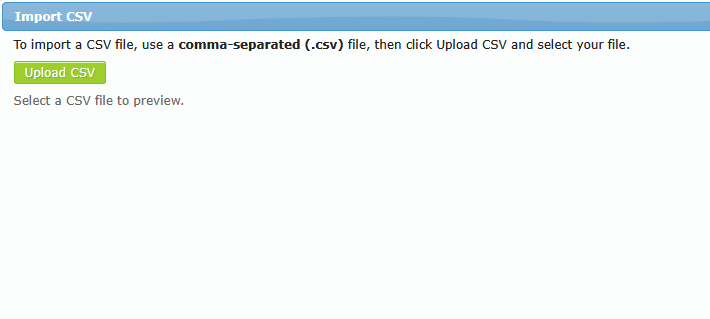
- Click the Import CSV button.
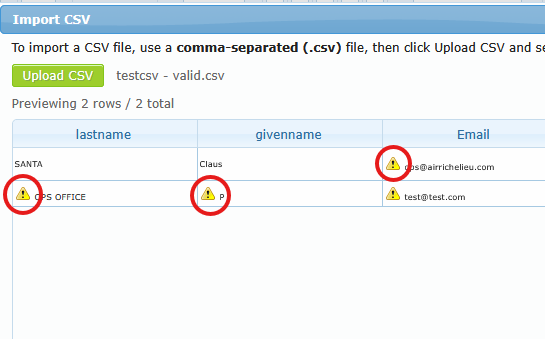
- Click Upload CSV and choose your file.
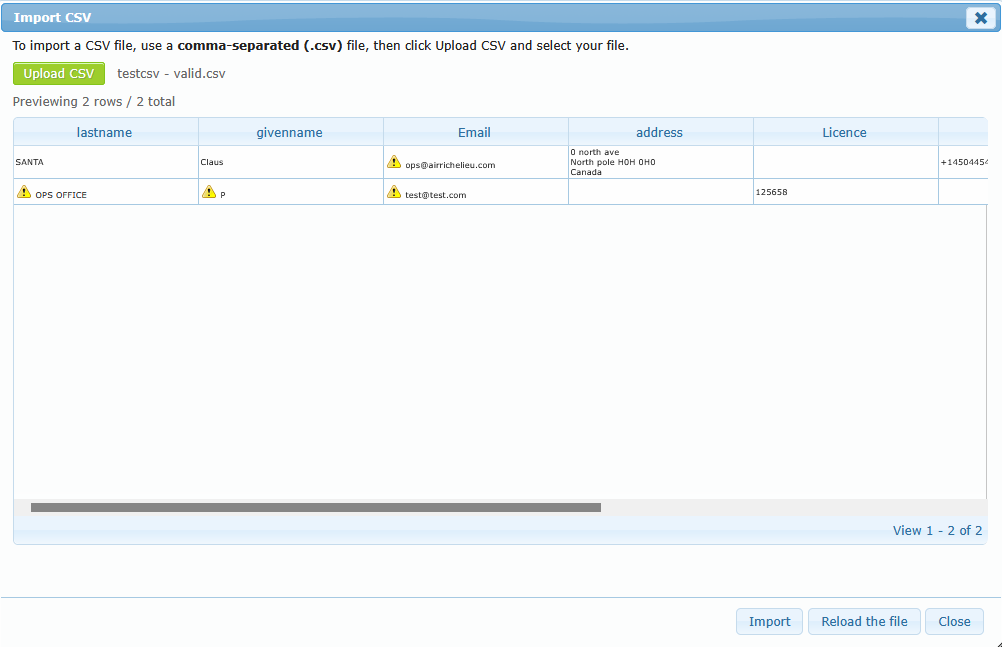
- Review the preview table and warning icons.
- If no blocking issue remains, click Import.
The Import button is shown only when a file is selected.

Understanding warnings and blocked imports
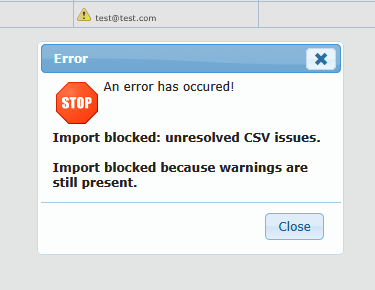
The preview step is there to protect your live data. If the system detects a problem, it shows a message and blocks the final import.
Common blocking messages include:
- Unauthorized column(s)
- Missing required column(s)
- Malformed CSV row(s) (wrong number of columns)
- Import blocked: unresolved CSV issues
During detailed row validation (before saving), you may also see messages such as:
- Line X: lastname, givenname and email are required
- Line X: email is not valid
- Line X: phone/cell is not valid
- Line X: license is not valid
- Line X: duplicates another line in the same file
- Line X: member already exists (name, email or license)
If any of these checks fail:
- The system returns an error stating that nothing has been saved.
- No row is inserted until all rows comply.
Success result and what happens next
When everything is valid, the system imports the file and confirms how many members were added. After success, the dialog closes and the members grid is refreshed to show the new records.
Practical checklist for admin staff
Before upload:
- Use only approved headers.
- Confirm required fields are filled on every row.
- Remove columns that are not part of this import tool.
Before clicking Import:
- Review the preview.
- Resolve any warning/blocking message first.
- After each file modification, click on the button ‘Reload file’ to apply changes and verify if all rows comply.
After import:
- Confirm new members appear in the grid.
- Open a few profiles to verify key fields (name, email, license).